文生图:介绍一个文字生成图片的开源工具
当前位置:点晴教程→知识管理交流
→『 技术文档交流 』
介绍一个文字生成图片的开源项目,我已经在本地搭建完成了使用了。
一:下载源代码地址:https://github.com/AUTOMATIC1111/stable-diffusion-webui 直接下载,解压就行。
二:环境搭建使用Anaconda环境中搭建: #进入加压包 cd stable-diffusion-webui #创建环境 conda create --name stable-diff python=3.10 #激活环境: conda activate stable-diff #首次运行(会下载模型): python launch.py
三:运行运行:
python webui.py
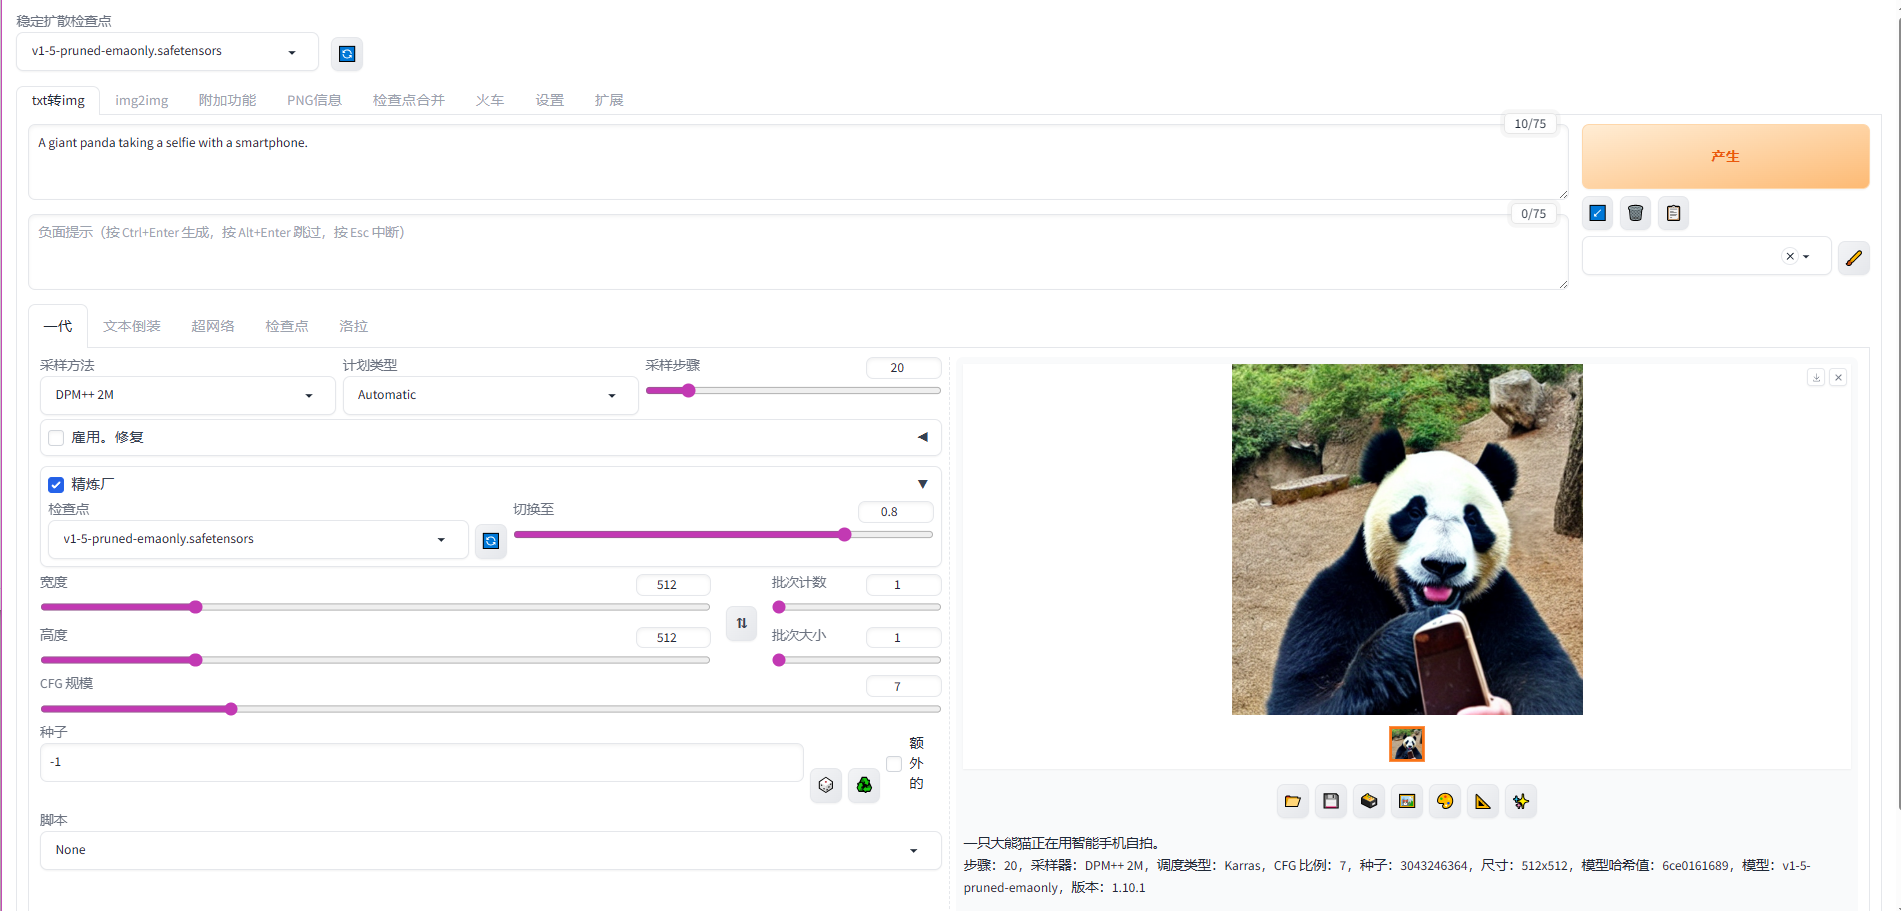
四:添加v2新模型这里默认下载的是v1-5-pruned-emaonly。查了下最新的有v2版本,下面就配置个v2版本。 (1):模型下载:https://huggingface.co/stabilityai/stable-diffusion-2-1/tree/main
下载 文件v2-1_768-ema-pruned.safetensors 有点大5G。放到文件夹\stable-diffusion-webui\models\Stable-diffusion 中。 然后重启服务,刷新模板,重新生成。图片生成了,但是图像不对。
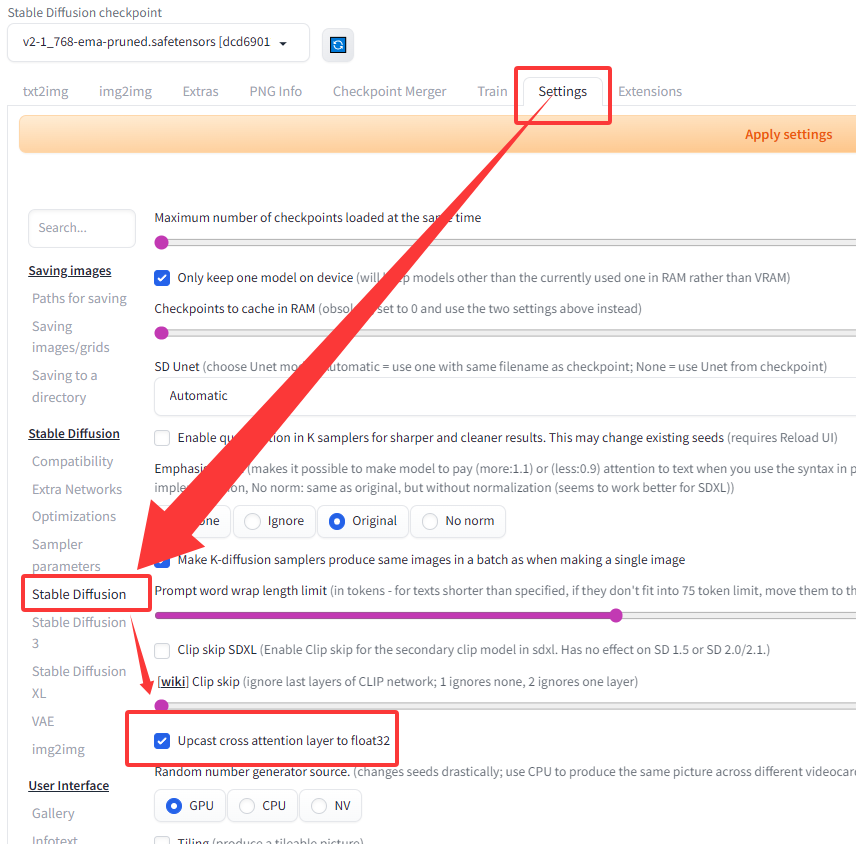
注意如果有报错,需要设置一下: modules.devices.NansException: A tensor with NaNs was produced in Unet. This could be either because there's not enough precision to represent the picture, or because your video card does not support half type. Try setting the "Upcast cross attention layer to float32" option in Settings > Stable Diffusion or using the --no-half commandline argument to fix this. Use --disable-nan-check commandline argument to disable this check.
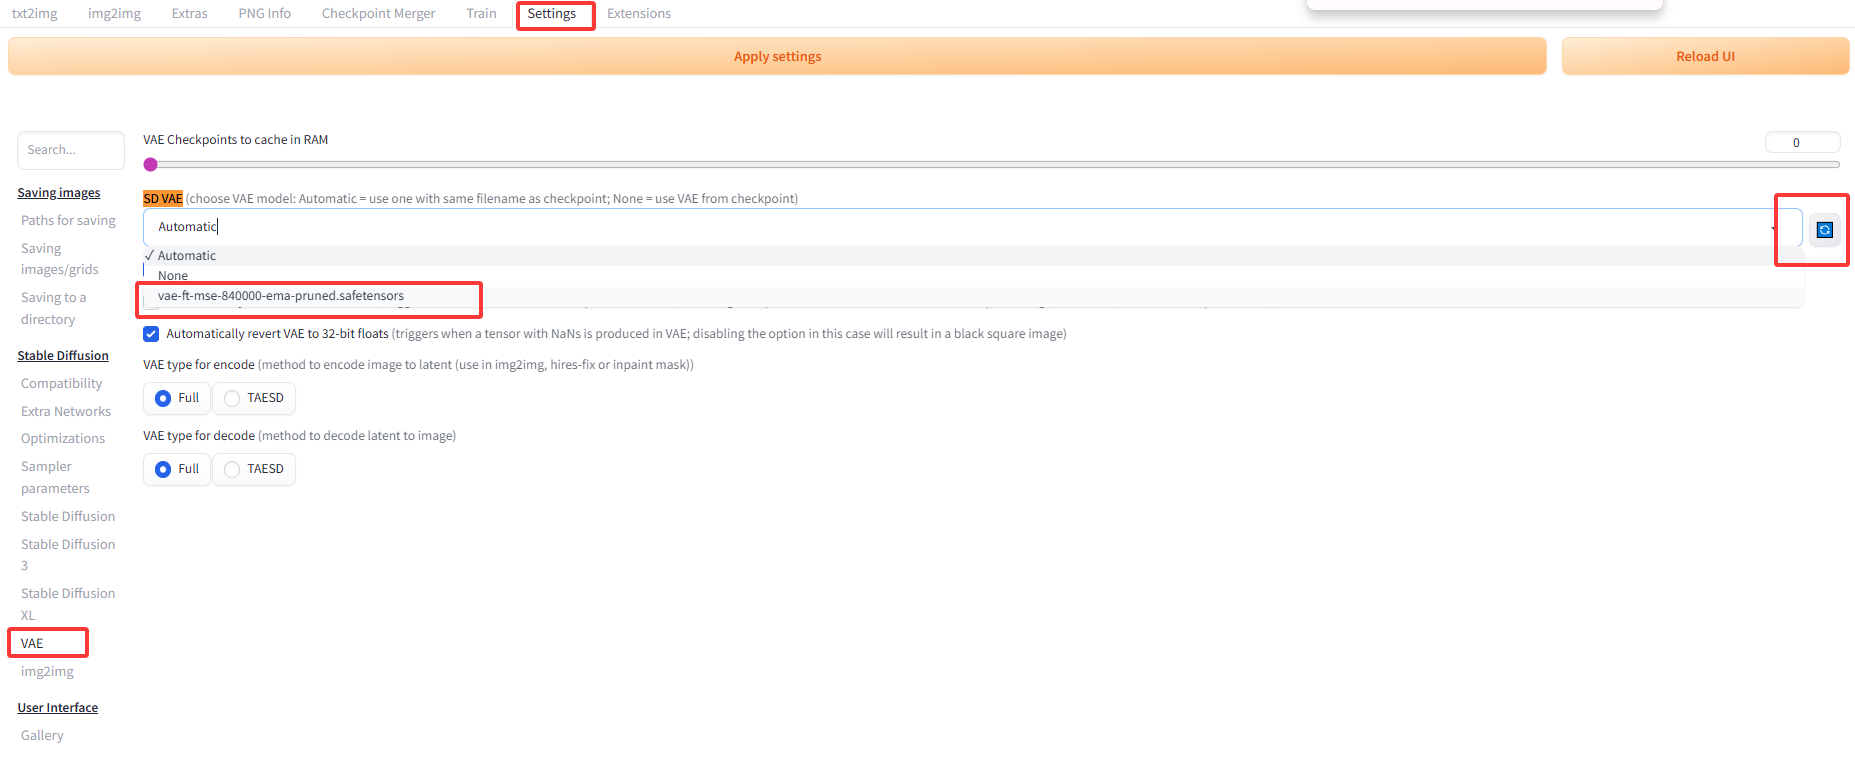
(2):解码器下载,这里使用社区开源的解码器 下载后存放在文件夹 \stable-diffusion-webui\models\VAE 。
(3):配置:
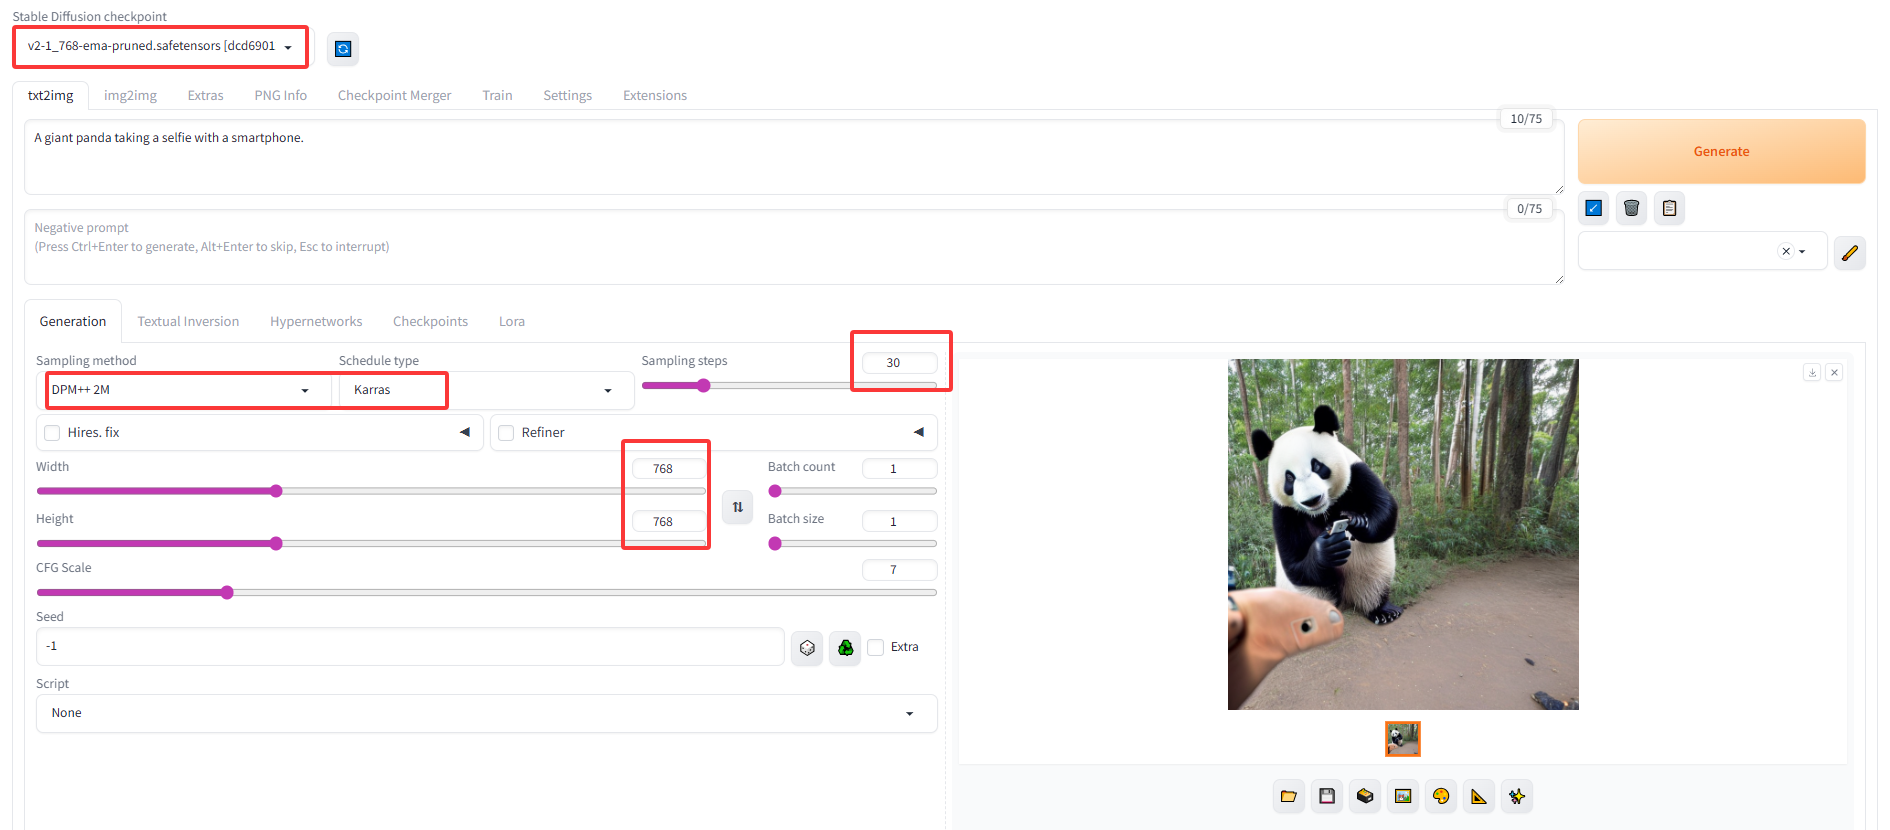
(4):重新启动,注意是在cmd的 conda 环境中重新启动服务。 选择v2时,有一些参数可以适当的修改一些,然后使用相同的提示词,重新点击生成。
搞定,收工。 最后一句:如果你的电脑还不错,GPU16G或者更大,可以试试:stable-diffusion-xl,画质更高(需要注意的是使用sd_xl模型是不需要配置VAE的,在设置里面将VAE设置为NONE,不然反而会降低画质)。 转自https://www.cnblogs.com/cj8988/p/18976662 该文章在 2025/10/13 8:53:26 编辑过 |
关键字查询
相关文章
正在查询... 


|


 400 186 1886